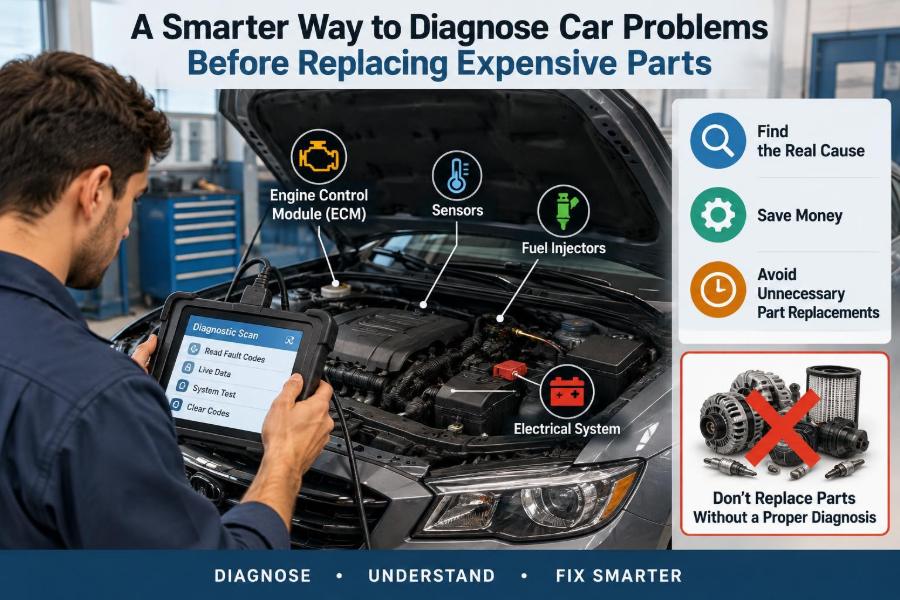

The warning light comes on, the engine feels slightly rough, and a quick online search points to an expensive sensor, fuel pump, or catalytic converter. It is tempting to order the part, fit it, and hope the problem disappears.
That approach sometimes works. More often, it turns a manageable fault into a costly guessing game. A modern car can produce the same symptom for several different reasons, and the component named by a diagnostic code is not always the component that failed.
For students learning vehicle systems and professionals working under time pressure, the useful skill is not simply finding faults. It is building a chain of evidence: what changed, under which conditions, which system could cause it, and what test can confirm or reject that idea.
A smarter diagnosis protects the customer, reduces repeat repairs, and improves safety. It also makes automotive work more interesting: instead of replacing parts, you are solving a system problem.
🧠 Diagnosis Is Evidence, Not a Parts List
Diagnosis is the process of identifying the root cause of a symptom. Repair is the action taken after the cause is known. Confusing the two is the source of many unnecessary replacements.
A fault code, a noise, or a dashboard warning is evidence. It narrows the search, but it rarely proves a single defective part by itself. Think of a code reader as a signpost, not a verdict.
🔍 Separate the Symptom from the Suspected Cause
“The car has a bad oxygen sensor” is a conclusion. “The engine light is on, fuel economy dropped, and the code indicates a lean mixture” is a useful starting description.
Record what the driver actually experiences: hesitation, stall, vibration, hard starting, poor braking, uneven tyre wear, or a noise. Then ask when it occurs: cold, hot, under load, at idle, during turns, or only after rain.
- Symptom: engine cranks slowly on cold mornings.
- Possible causes: weak battery, corroded cable, high starter current draw, poor ground, or unsuitable oil viscosity.
- Testable question: does voltage drop excessively at the battery or cable during cranking?
🗣️ Begin with the Driver’s Story
A brief interview can save an hour of testing. Ask when the fault began, whether work was recently performed, whether the vehicle was refuelled or jump-started, and whether the problem is constant or intermittent.
Words such as “judder,” “won’t start,” and “loses power” can mean different things to different drivers. Clarify them. Does “won’t start” mean the starter does not crank, the engine cranks but does not fire, or it starts and immediately stalls?
📋 Verify the Complaint Before Testing
Do not diagnose a symptom you have not observed or confirmed. If conditions permit, reproduce it safely and note the operating state: coolant temperature, road speed, gear, engine load, battery voltage, and warning lamps.
An intermittent fault may not appear in the workshop. That does not make it unreal. It means the conditions needed to trigger it must be understood and, if possible, recreated.
👀 Use the Five Senses, Carefully
A disciplined visual and sensory inspection often finds problems that a scan tool cannot. Look for loose connectors, damaged insulation, fluid leaks, disturbed hoses, broken clips, worn belts, and signs of rubbing or overheating.
Listen for exhaust leaks, wheel-bearing rumble, relay chatter, belt squeal, and suspension knocks. Smell can also help: fuel, coolant, overheated friction material, or burning insulation each point toward different systems.
Never use touch near moving belts, fans, hot exhaust components, high-voltage orange cables, or an operating ignition system. Safety comes before observation.
🧰 Check the Basics Before the Electronics
Many electronically controlled systems still depend on basic mechanical and electrical conditions. A split intake duct can affect mixture control. Low oil can trigger variable valve timing issues. A loose battery terminal can create several unrelated warning messages.
Before interpreting advanced data, check fluid levels and condition, battery security, visible grounds, air-filter housing fitment, vacuum lines, fuses, and obvious connector damage. This is not simplistic work; it is efficient fault isolation.
🔋 Establish a Healthy Electrical Foundation
Control modules and sensors need stable voltage and reliable ground paths. A battery may illuminate lights yet still drop too low during cranking for modules to communicate correctly.
Measure battery state appropriately, inspect terminals for corrosion, and test charging-system performance under realistic electrical load. A charging voltage that seems acceptable at idle may behave differently with headlights, blower, rear defrost, and cooling fans operating.
Also inspect the ground side. Corrosion inside a cable, a loose engine-to-body strap, or paint beneath a ground eyelet can create faults that mimic failed modules or sensors.
⚡ Learn Voltage Drop Instead of Trusting Continuity
A continuity test checks whether a path exists, usually with almost no load. It can miss a connection that passes a tiny meter current but fails when a starter, fuel pump, or cooling fan demands substantial current.
A voltage-drop test measures the voltage lost across a cable, switch, or connection while the circuit is operating. Excessive drop identifies unwanted resistance in the real working condition.
For example, if a starter cranks slowly, test from battery positive to starter positive while cranking, then from starter housing to battery negative. This separates supply-side and ground-side restrictions without removing the starter first.
💻 Read Trouble Codes in Context
Diagnostic trouble codes identify a circuit, sensor signal, system performance issue, or communication problem. They do not necessarily name the failed part. A code related to low sensor signal may be caused by wiring, poor ground, a reference-voltage fault, air leak, mechanical condition, or the sensor itself.
Read all stored, pending, and history codes where the scan tool supports them. Multiple codes can reveal a shared cause, such as one power supply, ground point, or damaged harness.
🧊 Freeze-Frame Data Captures the Moment
Many engine controllers store a snapshot of conditions when a qualifying fault occurred. This freeze-frame data may include speed, temperature, engine load, fuel trim, and RPM.
A mixture-related code set at warm idle suggests a different direction from the same code set during hard acceleration. At idle, a small air leak can have a large effect because airflow is low. Under load, fuel delivery or exhaust restriction may become more relevant.
📈 Use Live Data as a Pattern, Not a Single Number
Live data is valuable when interpreted as a relationship between signals. Watch how coolant temperature changes from cold start, whether throttle position responds smoothly, and whether manifold pressure, airflow, RPM, and fuel correction agree with the operating condition.
A single reading can look suspicious simply because units differ by manufacturer or the scan tool labels data poorly. Compare it with a known-good expectation, related signals, and the vehicle’s actual behaviour.
🧪 Compare Command, Input, and Result
A powerful diagnostic structure is to ask three questions: what did the controller command, what input did it receive, and what physical result occurred?
Suppose a cooling fan does not run. Check whether the module commands the fan, whether the relay or driver receives that command, whether power reaches the motor, and whether the motor runs when supplied correctly. Each test moves the diagnosis forward.
This prevents the common mistake of replacing the fan motor merely because the engine ran hot.
🌬️ Diagnose Air Leaks and Mixture Complaints Systematically
Unmetered air entering after an airflow sensor can produce lean-running symptoms, unstable idle, and mixture-related codes. Intake boots, hose joints, manifold gaskets, brake-booster lines, and purge-system hoses are common inspection points.
Fuel-trim data can offer clues. Positive correction means the controller is adding fuel in response to a perceived lean condition; negative correction means it is removing fuel. It does not, by itself, prove why.
A smoke machine, used according to safe workshop practice, can reveal leaks more reliably than spraying flammable products around a running engine.
⛽ Test Fuel Delivery Rather Than Assuming a Bad Pump
Poor acceleration or a no-start condition may involve fuel quality, pressure, volume, injector control, restricted filtration, electrical supply, or mechanical engine problems. A pump that runs audibly is not automatically delivering enough fuel.
Use manufacturer procedures and suitable equipment to check pressure where applicable, but remember that pressure alone may not show restricted volume under load. Electrical tests at the pump connector can distinguish a supply fault from a pump fault.
Fuel systems can remain pressurised after shutdown. Follow vehicle-specific depressurisation procedures and fire precautions.
🔥 Treat Misfire Codes as a Starting Point
A misfire code identifies abnormal combustion, often on a specific cylinder. The cause can be ignition, fuel, compression, valve timing, air leakage, oil contamination, or a wiring issue.
Where appropriate, swapping a coil or spark plug between cylinders can be a useful controlled test: if the fault follows the component, suspicion increases. If it does not, do not keep replacing ignition parts without checking injector operation and mechanical condition.
Persistent misfire can overheat a catalytic converter because unburned fuel may enter the exhaust. Avoid unnecessary driving until the cause is assessed.
🧱 Confirm Mechanical Health When Electronics Look Normal
Electronic control cannot compensate for every mechanical failure. Low compression, burnt valves, incorrect cam timing, head-gasket leakage, or restricted exhaust flow can resemble sensor or fuel-system faults.
Compression and leak-down tests are different. Compression testing observes the pressure built during cranking. Leak-down testing introduces regulated air into a cylinder at a known position and helps indicate where it escapes: intake, exhaust, crankcase, or cooling system.
These tests require correct procedure and interpretation. Results should be compared across cylinders and with relevant service information, not judged from one isolated number.
🛞 Let the Road Test Guide Chassis Diagnosis
Many chassis faults are condition-dependent. A vibration that appears only at motorway speed differs from a shake felt only during braking. A clunk over bumps differs from a click on full steering lock.
Road testing should be planned, safe, and legal. Record whether the symptom changes with speed, engine RPM, braking force, steering angle, road surface, or vehicle load. Those distinctions help separate tyres, wheels, brakes, driveline, bearings, and suspension.
🛑 Do Not Diagnose Brake Problems by Appearance Alone
Pad thickness is only one part of brake diagnosis. A pull, noise, pulsation, overheating wheel, or long pedal may involve seized hardware, uneven friction material, rotor runout or thickness variation, hydraulic restriction, air in the system, tyre condition, or electronic brake control.
After a cautious drive, an unusually hot wheel can suggest brake drag, but do not touch hot components. Compare temperatures with appropriate tools and investigate the caliper, slides, hose, parking-brake mechanism, and hydraulic release path.
📏 Measure Wear Instead of Guessing
Measurement turns opinions into decisions. A micrometer can assess brake-disc thickness, a dial indicator can check runout where needed, and a tyre gauge can verify pressure and tread condition.
Use the specification that applies to the vehicle and component. “Looks worn” is not enough when safety-critical limits, service procedures, and machining or replacement decisions are involved.
🔊 Localise Noises Before Naming Parts
Noises travel through body structures, so the loudest point is not always the source. A wheel-bearing hum may change when the vehicle load shifts during a gentle turn, while a tyre-pattern noise may vary with road surface.
Use descriptions carefully: click, squeak, scrape, rumble, whine, knock, and chirp are useful only when paired with operating conditions. A mechanic’s stethoscope can help on stationary components, but it is not a substitute for safe inspection.
🧭 Understand Network and Module Faults
Modern vehicles use communication networks so modules can share speed, temperature, braking, steering, and body-control information. A communication code may arise from low battery voltage, damaged wiring, a shorted module, water intrusion, poor termination, or an actual module failure.
Do not condemn a control unit before checking its powers, grounds, fuses, connector condition, and network integrity using approved information. Module replacement may also require programming, configuration, or security procedures.
🔧 Respect Recent Repairs and Modifications
If a fault began immediately after a battery replacement, audio installation, accident repair, engine service, or aftermarket modification, inspect that area first. A trapped harness, missed ground, intake hose left loose, or incorrectly routed vacuum line is more plausible than a random simultaneous component failure.
This is not blaming previous work; it is using timing as diagnostic evidence. Good technicians verify their own completed work in the same way.
📚 Use Service Information as a Test Plan
Reliable repair information provides wiring diagrams, connector views, pin functions, test conditions, specifications, technical procedures, and known service precautions. It prevents testing the wrong terminal or applying an incorrect expected value.
Generic advice is useful for understanding principles, but vehicle-specific systems differ. Never assume wire colours, sensor supply voltage, relay logic, or relearn procedures are identical across makes and model years.
🧑🔬 Make Each Test Capable of Changing Your Mind
A good test has a purpose and a clear interpretation. Before connecting the meter, state the hypothesis: “If the pump has supply voltage and ground under load but does not operate, the pump or its local connection becomes more likely.”
Tests that cannot distinguish between possibilities create activity without progress. Repeating a scan, clearing codes, or replacing a low-cost part may feel productive, but it can erase useful evidence.
🗂️ Record Findings So the Logic Can Be Checked
Document the complaint, codes, freeze-frame details, inspection findings, readings, test conditions, and repair verification. This creates a diagnostic trail that another technician can understand.
Clear notes are particularly valuable with intermittent faults. “No fault found” is weak. “Customer reports stall after hot soak; no reproduction today; battery terminals secure; charging system checked; stored code and freeze-frame recorded” is actionable.
⚠️ Avoid the Most Expensive Diagnostic Habits
- Replacing the code’s named component: codes identify a monitored problem, not always a failed part.
- Testing only at rest: many faults appear only under heat, vibration, load, or cranking current.
- Ignoring basic inspections: damaged hoses and connectors are easy to miss and easy to fix.
- Using a meter incorrectly: wrong ranges, poor probe contact, and back-probing damage can create misleading results or new faults.
- Clearing codes too early: valuable freeze-frame and readiness information can be lost.
🛡️ Know When to Stop and Escalate
Some faults require specialist equipment, manufacturer software, high-voltage training, calibration capability, or deeper mechanical disassembly. Hybrid and electric vehicles, airbags, advanced driver-assistance systems, fuel leaks, severe brake defects, and overheating concerns demand particular caution.
Escalation is not failure. It is appropriate risk management when the cost of a wrong action is high or the system has safety-critical procedures.
✅ Verify the Repair Under the Original Conditions
A repair is not complete merely because the warning lamp is off. Reassemble correctly, check for leaks or loose connections, clear codes only when appropriate, and reproduce the original operating conditions if safe to do so.
Confirm that the symptom is gone, relevant live data is sensible, and no related faults return. If an adaptation or relearn procedure is required, complete it using the correct method.
🎯 Build a Repeatable Diagnostic Routine
A consistent sequence prevents assumptions from taking over. The exact tests will vary, but the thinking can stay stable.
- Confirm the complaint and gather the driver’s observations.
- Inspect basics and identify safety risks.
- Scan the vehicle and preserve codes and freeze-frame data.
- Form likely hypotheses based on symptom, conditions, and system operation.
- Perform targeted tests that can confirm or reject each hypothesis.
- Repair the proven cause, then verify under the original conditions.
🏁 The Core Principle: Prove Before You Replace
The smartest diagnostic habit is simple: replace a component because evidence supports its failure, not because it appears near a fault code or matches a familiar symptom.
Visual checks, driver history, circuit tests under load, scan data, mechanical measurements, and service information each reveal a different part of the story. Used together, they reduce uncertainty far more effectively than any single tool.
This method may seem slower at the beginning, but it usually saves time by preventing detours. It builds confidence, protects expensive components from needless replacement, and produces repairs that last.
Good automotive diagnosis is not about guessing the most likely part; it is about testing the most likely cause until the evidence is strong enough to act. 🚗🔧🧠