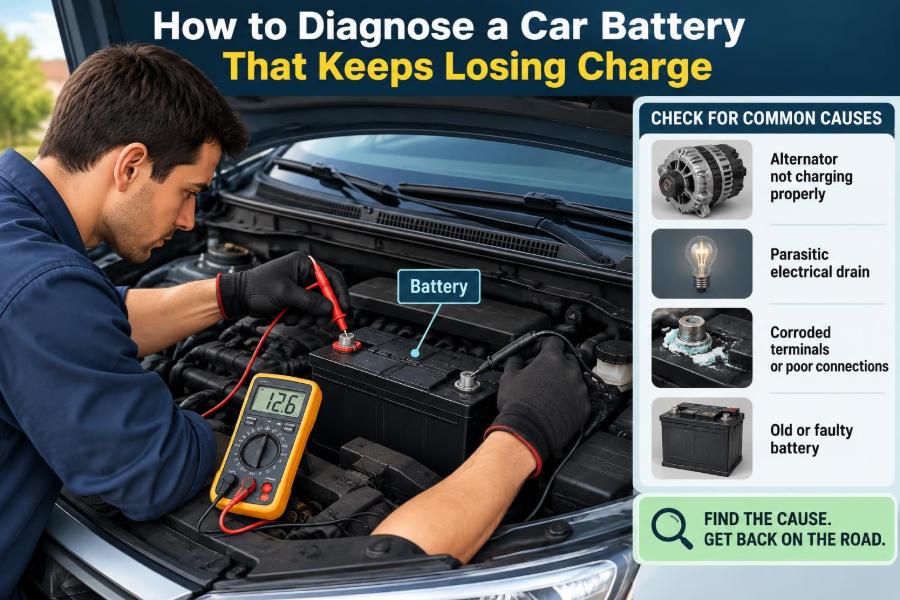

You walk out to the car after work, turn the key or press the start button, and hear a slow crank—or nothing at all. A jump-start gets you moving, so it is tempting to assume the battery simply needed a boost.
But when the same problem returns a day or two later, the question changes. Is the battery worn out, is the alternator failing to recharge it, or is something quietly using power while the car is parked?
A car battery that repeatedly loses charge can leave a driver stranded and can also point to a fault elsewhere in the electrical system. Diagnosing it methodically prevents the expensive habit of replacing parts based on guesswork.
The useful approach is to separate three possibilities: the battery cannot store energy, the charging system cannot replace energy, or the vehicle has an abnormal drain. Each leaves different clues.
🔋 Start With What “Losing Charge” Actually Means
A starting battery stores electrical energy chemically and releases it quickly to operate the starter motor. It also supplies power to lighting, control modules, locks, and accessories when the engine is not running.
“Flat battery” is a symptom, not a diagnosis. A battery can be discharged by normal use, damaged internally, undercharged by a faulty alternator, or drained by a load that should have switched off.
⚡ Understand the Three Main Failure Paths
Think of the vehicle electrical system as a water tank. The battery is the tank, the alternator is the pump that refills it with the engine running, and electrical consumers are outlets drawing water.
- Weak battery: it cannot retain useful capacity even after correct charging.
- Charging fault: the alternator, belt, wiring, or regulator does not replenish the battery adequately.
- Parasitic draw: an unwanted load discharges the battery while the vehicle is parked.
More than one condition can exist at once. For example, repeated deep discharge from a parasitic draw can shorten an otherwise serviceable battery’s life.
🧾 Record the Pattern Before Testing
Timing gives valuable evidence. A car that fails immediately after a long drive differs from one that starts normally each morning but is dead after sitting for three days.
Note whether the trouble occurs after short urban trips, cold nights, use of an accessory, recent repairs, or leaving the car unused. Also record warning lights, dim lamps, slow wipers, infotainment resets, and unusual messages on the instrument panel.
👀 Inspect the Battery Case and Its Surroundings
With the engine off, look for a swollen case, cracks, liquid leakage, or a battery that is loose in its hold-down. A swollen battery can result from internal failure or charging-system overvoltage and should not be treated as a normal maintenance issue.
Check that the battery type and capacity are appropriate for the vehicle. Some vehicles require an absorbed glass mat (AGM) or enhanced flooded battery because of stop-start systems and high electrical demand; substituting an unsuitable type can reduce service life.
🧤 Work Safely Around Battery Power
Even a 12-volt automotive battery can deliver extremely high current. Remove rings, watches, and other conductive jewelry before working near exposed terminals, and keep sparks, flames, and cigarettes away from batteries.
Battery electrolyte is corrosive, and charging can produce flammable gas. Wear eye protection, use ventilation, and follow the vehicle manufacturer’s instructions. If a battery is cracked, leaking, or severely swollen, professional handling is the safer choice.
🔩 Check Terminals, Clamps, and Ground Connections
A sound battery cannot help if its connection is poor. Corrosion appears as white, blue-green, or powdery deposits around terminals and can create resistance that limits both starting current and charging current.
Check that terminal clamps are clean and cannot be twisted by hand when properly tightened. Follow the positive cable to its connections and inspect the negative cable where it attaches to the body and engine. A corroded engine ground may mimic a weak battery or starter.
🧹 Clean Connections Without Creating New Problems
Disconnect the negative terminal first, then the positive terminal, following the vehicle’s specified procedure if it has battery monitoring or memory-saving requirements. Clean corrosion with a suitable terminal brush and reconnect positive first, negative last.
Do not force oversized clamps onto damaged terminals or use grease as a substitute for a secure metal-to-metal connection. Protective terminal treatment is applied after the connection is clean and tight, not in place of repair.
🌡️ Consider Temperature and Recent Use
Cold temperatures reduce the battery’s available cranking ability while the engine needs more effort to turn. Heat, on the other hand, accelerates chemical aging and can reduce battery life over time.
Frequent short trips are another common contributor. Starting the engine uses substantial energy, and a few minutes of low-speed driving may not fully restore it—especially with headlights, heated screens, blowers, and seat heaters operating.
📅 Check Battery Age—but Do Not Stop There
Many batteries carry a date code or installation label. Age provides context because batteries gradually lose capacity, but it does not prove the battery is the sole fault.
A relatively new battery can be repeatedly discharged by an electrical drain or damaged by an overcharging alternator. Conversely, an older battery may still be serviceable if it passes a proper capacity or conductance test.
🔌 Fully Charge the Battery Before Judging It
A discharged battery should be recharged with an appropriate smart charger before meaningful testing. Driving alone is an unreliable recovery method for a deeply discharged battery because alternators are designed primarily to maintain a charged battery, not to act as a rapid charger.
Select the correct charging mode for flooded, AGM, or other battery designs. Charging a physically damaged or frozen battery is unsafe; allow a very cold battery to warm appropriately and inspect it first.
📏 Measure Resting Voltage Correctly
After charging, let the battery rest with surface charge dissipated, ideally after the vehicle has been off for a period and no charger is connected. Measure directly across the battery posts with a digital multimeter, not only on the cable clamps.
A healthy, fully charged conventional 12-volt lead-acid battery commonly reads around 12.6 volts at rest. A reading around 12.2 volts indicates a substantially lower state of charge, but voltage alone does not reveal the battery’s true capacity.
🧠 Know the Limits of a Voltage Reading
Voltage is like checking the pressure in a water system with every tap closed: it says little about how well the supply holds up under demand. A weak battery may show a respectable resting voltage and then collapse when asked to crank the engine.
Likewise, a low voltage may simply mean the battery has not been fully charged. Use voltage to guide the next test, not as the only reason to condemn a battery.
🚘 Observe Voltage During Engine Cranking
Connect the meter and watch the reading while the engine is started. A large voltage drop, especially combined with slow cranking, may indicate a discharged or weak battery, excessive starter demand, or high resistance in cables and grounds.
The exact acceptable cranking voltage depends on temperature, battery design, and vehicle system requirements. A professional load test or electronic conductance test is more reliable than applying one universal threshold to every car.
🧪 Use a Proper Battery Capacity Test
Many workshops use a conductance tester, which estimates battery condition by examining its electrical response. Traditional load testing applies a controlled load and observes voltage behavior. Both tests should be performed on a sufficiently charged battery.
Ask for results that distinguish state of charge from state of health. State of charge describes energy currently available; state of health describes the battery’s remaining ability to deliver current and store energy.
🔄 Verify Alternator Charging Voltage
Start the engine and measure voltage at the battery terminals. On many conventional systems, charging voltage rises above resting battery voltage, often somewhere in the mid-13 to mid-14 volt range depending on conditions.
Modern smart-charging systems may intentionally vary voltage based on battery temperature, state of charge, driving conditions, and energy-management strategy. For that reason, compare readings with manufacturer information rather than assuming one fixed number applies to every vehicle.
💡 Test the Charging System Under Electrical Load
Switch on several normal loads, such as headlamps, cabin blower, and rear window defroster where appropriate, then observe charging voltage and system behavior. A healthy system should support normal loads without the battery steadily taking over.
Do not create an excessive load merely to force a result. If lights dim sharply, a battery warning lamp appears, belts squeal, or voltage behaves erratically, arrange a charging-system inspection.
🛞 Inspect the Drive Belt and Alternator Wiring
An alternator cannot charge correctly if its drive belt is slipping, damaged, contaminated, or incorrectly tensioned. Belt issues may be most obvious during wet weather or when high electrical loads are switched on.
Inspect visible alternator connectors, main charging cables, and nearby fuse links for looseness, heat damage, or corrosion. Avoid probing unfamiliar high-current or hybrid-system components without correct procedures; modern vehicles can contain additional electrical hazards.
🚨 Treat the Battery Warning Light as a Charging Clue
The battery-shaped warning light usually refers to the charging system, not a direct measurement of battery condition. It can illuminate when alternator output, belt drive, wiring, or system monitoring is abnormal.
If the light appears while driving, reduce unnecessary electrical load and seek a safe place to stop. Continuing until the engine stalls may leave the vehicle without reliable lighting, steering assistance on some models, or the ability to restart.
🌙 Recognize the Signs of Parasitic Draw
A parasitic draw is current consumed after the vehicle should have entered sleep mode. A small standby load is normal because clocks, alarms, keyless-entry receivers, and memory modules need some power.
The concern is an excessive draw or a module that never sleeps. Typical clues include a battery that is fine after daily use but dies after parking, warm electronic components, a light remaining on, or an aftermarket device behaving strangely.
⏳ Let Electronic Modules Go to Sleep
Testing for draw too soon produces misleading results. Many vehicles keep modules awake after doors are opened, the key is used, or a diagnostic port is accessed; some need a considerable period to enter sleep mode.
Close latches as required by the test procedure, keep the key fob away from the vehicle if proximity systems are fitted, and avoid opening doors during measurement. Consult vehicle-specific instructions when available because sleep behavior varies widely.
🔍 Measure Key-Off Current With Care
An ammeter must be connected in series, meaning current flows through the meter. Connecting a meter set to current mode directly across battery terminals creates a short circuit and can damage the meter, blow its fuse, or cause sparks.
A clamp meter designed to measure low DC current can be less disruptive, but it must have adequate resolution. Typical acceptable standby current varies by vehicle and equipment, so rely on the manufacturer’s specification or a qualified technician’s procedure.
🧩 Isolate a Drain Systematically
Once excessive key-off draw is confirmed after sleep mode, isolate circuits one at a time. Removing and refitting fuses while monitoring current can identify the circuit associated with the drop.
Do not assume the fuse itself is the fault. The fuse points to a branch containing components, wiring, or modules that require further investigation. Fuse diagrams, wiring schematics, and scan-tool data make this process much more efficient.
💡 Look for the Ordinary Loads First
Simple faults are common: glovebox, vanity-mirror, trunk, or under-hood lamps that fail to switch off; a door latch that does not report closed; or a phone charger left connected to a live socket.
Check visually in a dark garage, but remember that LED lamps may draw little visible attention. A latch adjustment or failed switch can be the real repair, rather than a new battery.
📻 Consider Aftermarket Accessories and Recent Work
Dash cameras, audio amplifiers, trackers, alarm systems, remote starters, and poorly installed USB adapters can remain active when the car is parked. Their wiring may also bypass normal power management.
If trouble began after audio work, a new battery, body repair, or accessory installation, inspect that area first. This is not proof of causation, but it is a sensible diagnostic priority.
🖥️ Account for Software, Modules, and Network Faults
Modern vehicles use control modules connected through communication networks. A module can stay awake because it has an internal fault, receives an invalid signal, or is repeatedly awakened by another module or sensor.
These faults can require a scan tool, wiring information, and software updates specified by the manufacturer. Randomly disconnecting modules may create fault codes or hide the actual trigger, so advanced diagnosis is often best left to a trained technician.
🔑 Do Not Forget Keyless Entry and Key Fobs
Some proximity-key systems wake when a fob is repeatedly detected nearby. Storing a key close to the parked vehicle, or a damaged fob transmitting unexpectedly, can sometimes contribute to unusual behavior.
As a simple controlled check, keep keys farther away for a parking period and observe whether the pattern changes. This does not replace current measurement, but it can support a more focused diagnosis.
🛑 Separate Starting Problems From Battery Problems
A clicking sound, no crank, or slow crank does not always originate with the battery. A failing starter motor can draw excessive current, and an ignition, neutral-safety, clutch-switch, or immobilizer fault can prevent cranking with a healthy battery.
If the dashboard remains bright and a tested battery is charged, investigate the starting circuit rather than repeatedly jump-starting. Repeated attempts can overheat cables, starter components, and connections.
🔁 Avoid the Jump-Start Cycle
Jump-starting is a recovery technique, not a repair. If the engine starts after a jump but the battery soon becomes flat again, further jumps can conceal the root cause while subjecting the battery to repeated deep discharge.
Use correct jump points and polarity. Incorrect connections can damage electronic modules or create sparks; consult the owner’s manual, particularly on vehicles with remote jump terminals or battery sensors.
🧭 Match the Fix to the Proven Cause
Replace a battery when it fails a valid test after full charging, is physically damaged, or has lost usable capacity. Repair charging faults by addressing the actual cause: belt, wiring, alternator, regulator, connection, or control issue.
For parasitic draw, repair the identified consumer or circuit. Disconnecting the battery each night or fitting a larger battery only postpones diagnosis and may introduce lost settings, security issues, or additional battery damage.
🛠️ Know When Professional Diagnosis Is Worthwhile
Professional assistance is especially appropriate for repeated unexplained discharge, smart-charging systems, hybrid or electric vehicles, airbag-area wiring, alternator replacement, and suspected network-module faults. These cases require accurate tools and model-specific data.
Bring a clear symptom record: how long the car sits before failing, recent repairs, meter readings if available, and whether a jump-start works. Good observations shorten diagnostic time and reduce unnecessary parts replacement.
✅ Build Habits That Protect Battery Life
Drive long enough, often enough, for the charging system to replace starting energy, especially during cold weather or frequent short-trip use. If a vehicle will sit for extended periods, a compatible maintenance charger may help, provided it is used safely and according to the battery and vehicle guidance.
- Keep terminals clean and the battery securely clamped.
- Switch off accessories and confirm interior and cargo lamps extinguish.
- Address warning lights promptly rather than waiting for a no-start.
- Test a questionable battery before the season when demands are highest.
🏁 The Core Diagnostic Principle
Reliable diagnosis follows energy flow. First establish whether the battery is charged and capable, then confirm the alternator and its connections replenish it, and finally measure whether unacceptable current leaves it while parked.
This sequence matters because symptoms overlap. A new battery will not cure a hidden drain, an alternator will not restore a damaged battery’s capacity, and a voltage reading alone cannot prove either component is healthy.
A battery that keeps losing charge is best solved by testing storage, charging, and key-off drain in order—not by replacing the most visible part first. With a careful process, the fault becomes a manageable electrical problem rather than a recurring surprise. 🔋🚗🛠️